This is something that not enough ServiceNow Developers do, or do often enough.
Cloning a ServiceNow instance essentially means that you’re copying one environment over another. You take one environment (Source) and you copy it over another ServiceNow environment (Target).
The cloning process should be performed at least quarterly, in our opinion. It should be a repeatable part of your ServiceNow Lifecycle of development.
Over a long enough period of time, your production environment and your sub production environments get misaligned. You’ve done so much work in development, that it’s not an accurate reflection of what is going on in production. So you’ll want to down-clone production over development/test, so the environments will more accurately reflect one another.
We tend to recommend that the downclone process is run close to your upgrade process.
You’ll want to work with your ServiceNow team to do what makes sense.
You don’t need to get ServiceNow involved and it’s a relatively simple process that can be done in a few hours.
For larger ServiceNow instances, the down-clone takes a longer amount of time. For most instances, you can expect it to take around 3 hours.
How To Request A ServiceNow Clone
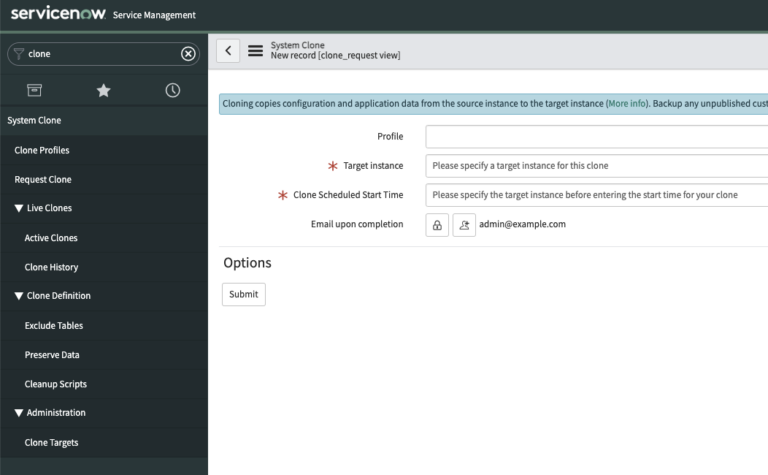
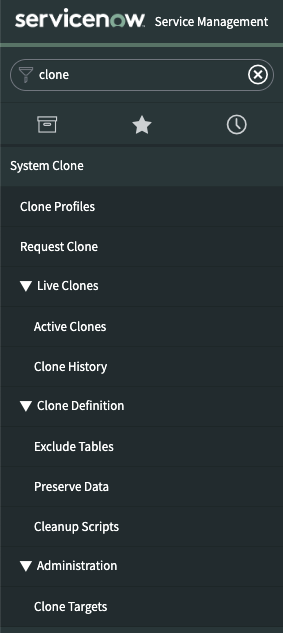
Navigate to System Clone > Request Clone in the Application Navigator. You can get there by typing “clone” in the app navigator and you’ll find what you need.
Click on “Request Clone”.
You’ll then see a new record for a System Clone with some fields that need to be populated.
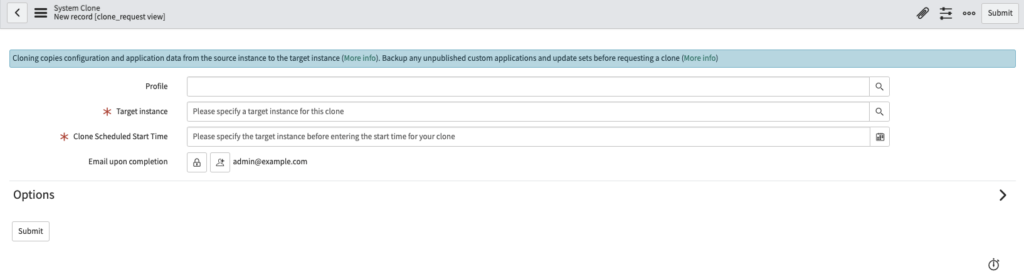
The Source environment is the instance being copied FROM. Usually Production.
The Target environment is the instance being copied TO. Usually Development/Test.
If this is the first time you’re creating a ServiceNow clone, you’ll need to first create a Target instance, to copy to.
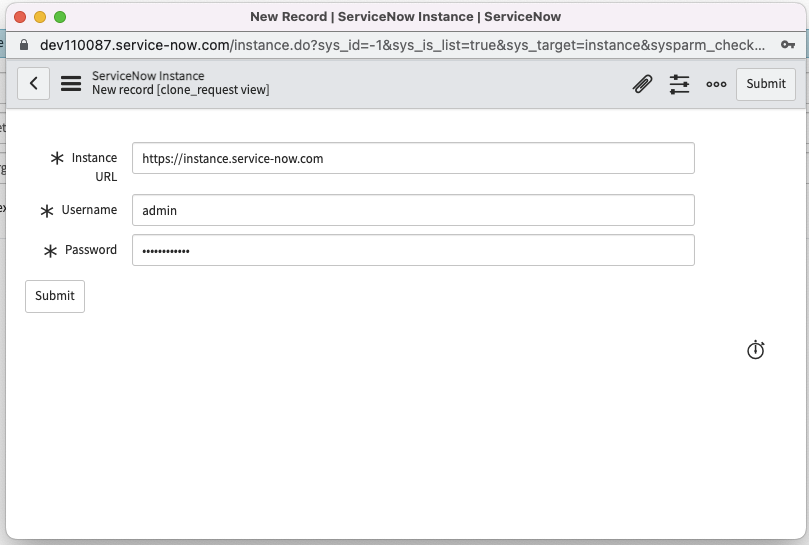
You will need the admin role in the source and target instance, before being able to submit a clone request – for obvious security related reasons.
At this point, just create the clone and if the form is filled out right, you’ll then see a new record in the “Active Clones” module. System Clone > Active Clones.
Congratulations, you’ve got a new ServiceNow clone all queued up. The Clones can be run on demand or scheduled out. If you’re running one immediately, I like to schedule it for 10 minutes from right now, as I know that will give the system time to “catch it” and will give me a few moments to make sure there’s nothing else I need to do before the clone kicks off. It’s one of the very few things in ServiceNow that once started, can’t be stopped – without the help of HI.
At this point, sit back and watch the clone process. You can go to the Active Clones module and literally watch all of the logs happen in real time, if that’s your kind of thing.
To review all of your previous clones, you can navigate to System Clone > Clone History.
For More Advanced Downclones
ServiceNow gives a lot of flexibility and automation with clones, that are not always needed but are nice to have if you happen to have a more mature ServiceNow process.
For companies that are undergoing an implementation or re-implementation, this is an area that you’re going to need to master. Get used to Exclude Tables, Preserve Data, and Cleanup Scripts.
By default, ServiceNow copies every single table from the source to the target. So it’s a 1:1 copy, except for the out of box tables that have been excluded. I believe that the out of box configuration is to not bring over larger tables like system logs and system emails.
But you can select which tables you do not want to copy over.
Say for example that you have a business need to NOT copy certain tables from production to development for some reason, you can Exclude Tables in your downclone. You will need to properly configure the Exclude Tables and Preserve Data records here, so make sure you set this up correctly according to the ServiceNow Docs below.
Go here to the ServiceNow docs to better understand the Exclude Tables process.
You can also automatically run scripts, after a clone has completed in the target instance. This is called a Clean Up Script. Go here to learn how to run a clean up script.
ServiceNow automatically out of box, runs some clean up scripts that do things like turn off email notifications, and update MID Servers.
Feel free to add your own clean up scripts, so you don’t have to quickly go in and flip some switches. This is going to give you power over ServiceNow and will decrease anxiety. I’ve seen a lot of well seasoned ServiceNow engineers not even know that this exists. And their typical course of action is to immediately go into ServiceNow once the downclone is completed and try to very quickly run scripts.
ServiceNow gives you the ability to do this automatically, so work with ServiceNow and not against it.