Understanding XML in ServiceNow
XML is just a data structure.
Your data in ServiceNow, can be easily moved around, using this data structure.
If you want to move data, for example incidents, from one ServiceNow instance to another, you can easily accomplish this by doing a quick export/import of XML.
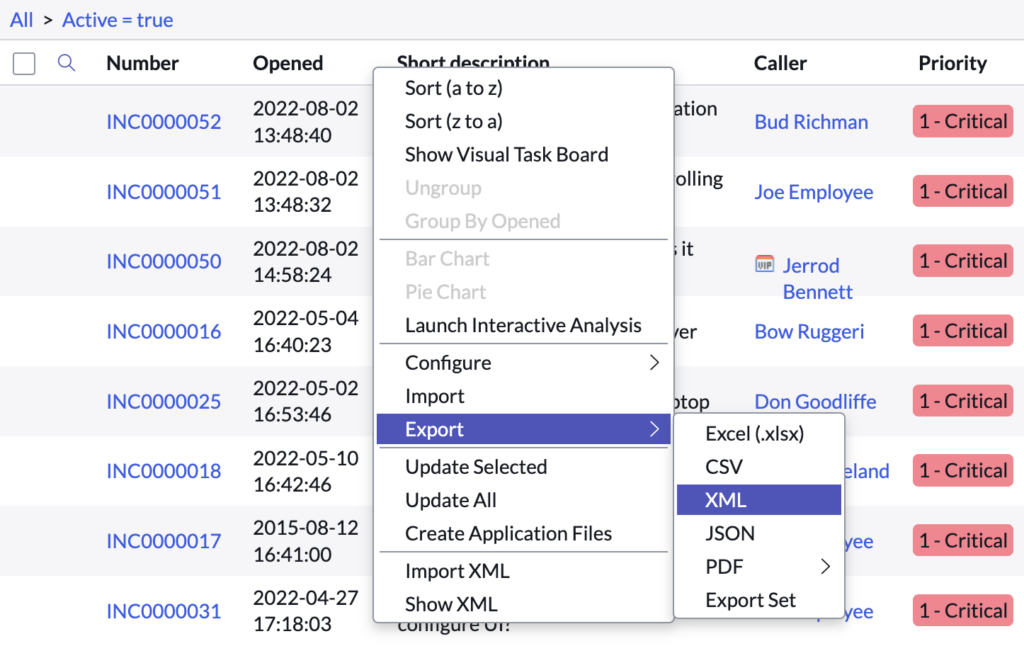
As a ServiceNow admin, you can navigate to any list, and you can export any amount of data locally, in the XML data structure.
Just like JSON is a common data structure, or way to organize data, XML is the same concept, but just stored in a slightly different way.
When you’re working with moving customizations, like scripts, from one instance to another, you always want to use update sets.
But when you’re working with moving task based data around, you can just do it via XML, as this data isn’t natively captured in update sets.

How To Migrate Data Via XML
If you’re a ServiceNow admin, so you have the ‘admin’ role, you can perform the below.
You’ll also need to be aware, from a security perspective, that this will download a file locally to your computer. So make sure that you’re doing this on your work machine.
Make sure that the instance your importing to, is ready for the data to be inserted.
Watch out for conflicts, like duplicate number value, which will cause major issues.
It’s best to try all of this in a test environment first.
To migrate XML from one ServiceNow environment to another, you can use the Import/Export XML feature in ServiceNow. This allows you to export the XML for the desired records from the source environment, and then import the XML into the target environment.
Here are the steps to migrate XML from one ServiceNow environment to another:
- In the source ServiceNow environment, navigate to the list of records that you want to migrate.
- Select the records that you want to migrate, and then click the “Export” button. This will generate an XML file containing the selected records.
- Save the XML file to your local computer.
- In the target ServiceNow environment, navigate to the list of records where you want to import the XML file.
- Click the “Import” button, and then select the XML file that you saved in step 3.
- Follow the prompts in the Import Wizard to complete the import process. This will import the records from the XML file into the target environment.
That’s all there is it it really.
Additionally, you may need to make sure that the target environment has the same customizations and configurations as the source environment in order for the migrated records to work correctly.
If you have different fields in between the 2 environments, the data will not come over as expected!
Again, if you’re moving customizations – do that in an update set.
But if you’re moving data, this is a super easy way to do it and it doesn’t require any sort of integration.

