Adding A UI Action (Button) To Any Form
In ServiceNow, admins can configure all aspects of a form.
This includes fields, relationships between these fields, the UI of the form, and also – UI Actions.
Whenever you hear “UI Action” in ServiceNow, it is just a button. Buttons can live on the form, a list view, related lists, and context menus.
Behind every UI Action, there is a piece of either Client Side code, Server Side code or a combination of the 2. Check out ServiceNow Guru post, who pioneered creating UI Actions with Client and Server code in the same button. ServiceNow Guru came up with this solution, even before ServiceNow had documented it.
You can read more about form fields here on the ServiceNow Documentation page.
How To Add A Button (UI Action) To A Form
Role Required: admin
For our example here, we’ll grab a value from the form and then display it in an informational message at the top of the form.
This use case is simply to show new admins how to create UI Actions and what they can do.
1) Go to the form in question and right-click the form header (gray bar at the top of the form)
Select Configure > UI Actions (click here)
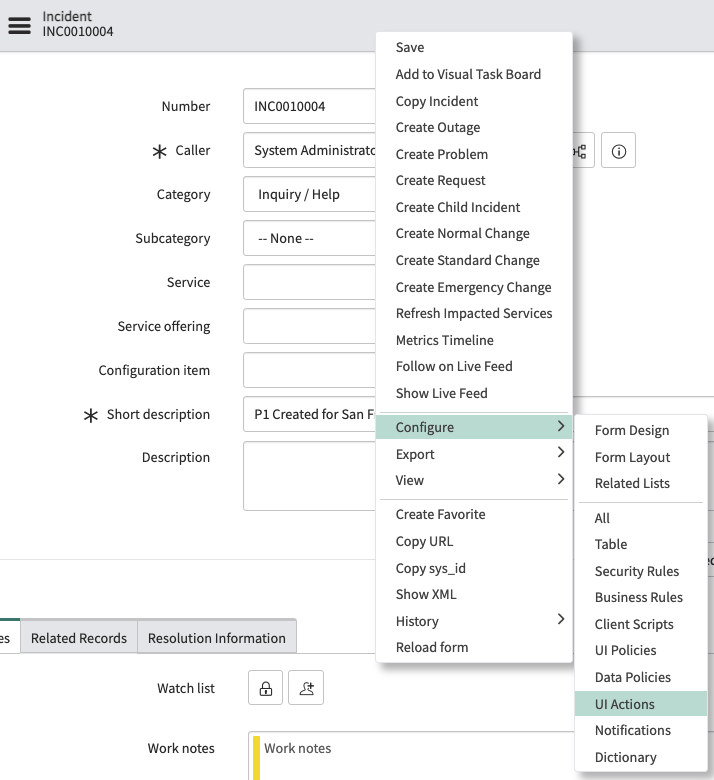
Alternatively, you can go directly to the UI Action [sys_ui_action] table in ServiceNow.
Like most things in ServiceNow, there are multiple ways to do the same thing.
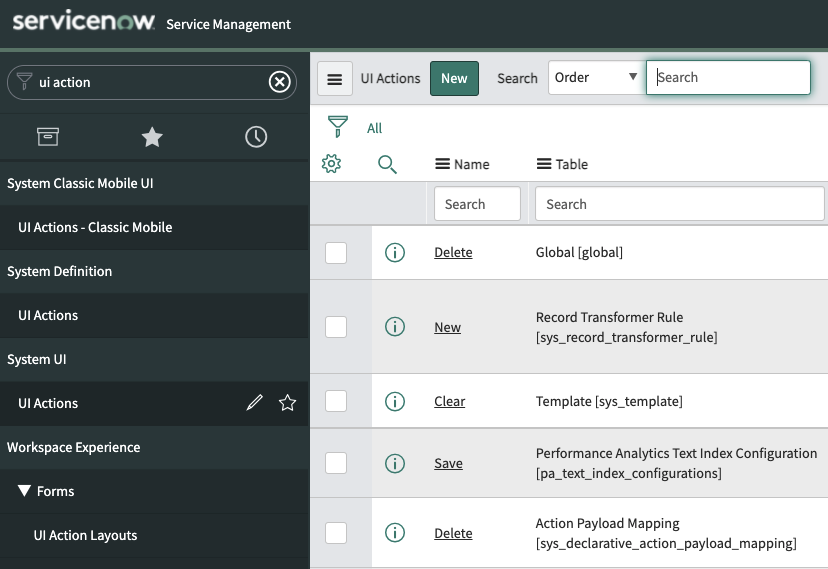
2) Once you’re in the UI Action table, click the “New” button at the top of the list view.
If this button doesn’t exist, go and check your ACL’s. There should be an out of box ACL that allows Admins to create new records on the UI Action table.
Once you’re here, you should have a blank new form, ready to be populated with some data.
The empty form will look like this:
![]()
At this point, you’re ready to write up some code to allow your end users to do something.
Why Add A Button To A Form
Behind the scenes, UI Actions run code.
As mentioned previously, the code can be client side, server side or a combination of the two.
For this, we’re going to write a simple client side script, with a condition.
This use case is just to show you what is possible when building out a UI Action. This is not a realistic scenario to copy.
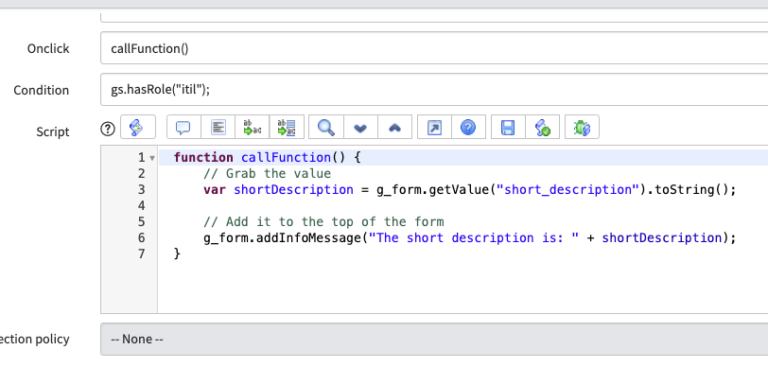
Below is the script that we’ll be running with.
Also pay attention to a few important fields on the form. Client is a boolean which indicates whether the code is client or server side. If it is marked false or unmarked, then the code is going to run on the server. So think GlideRecord Query and updating records when this button was clicked. I marked this true, so the code is client side.
Also pay attention to the form and list boolean fields. These show where the button is going to be shown. Most commonly, you’ll make it a “Form button”, which just adds the button to the top of the form.
You will see an Onclick field. If you don’t fill this out, then the script is never called. You have to define your function in this field, like below. So just add your function name.
What happens when you click the button on the form, ServiceNow grabs the “Onclick” function name and looks to your script and executes that function.
Remember to populate the Onclick field with the function you define in your script
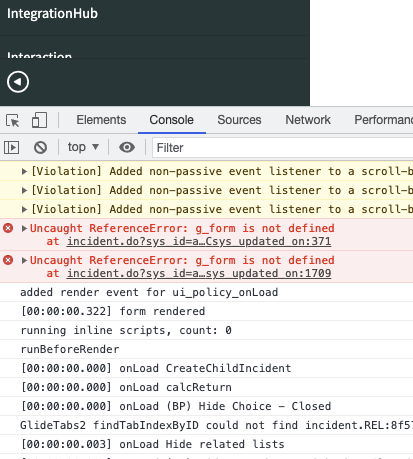
If don’t add the Onclick value, your browser will throw the following error:
Uncaught ReferenceError: g_form is now defined.
Adding an Onclick function value and making sure to define that function in your script solves this error.
How To Test The UI Action
Now go back to incident form.
If the condition of the UI Action is met – the button will be shown on the form.
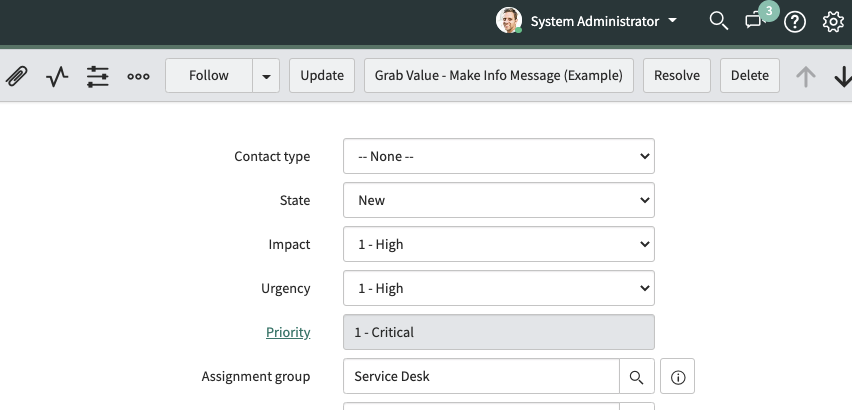
Now that the button is on the form, we can engage the script behind it.
When you click the button, you should get the following informational message at the top of the form.
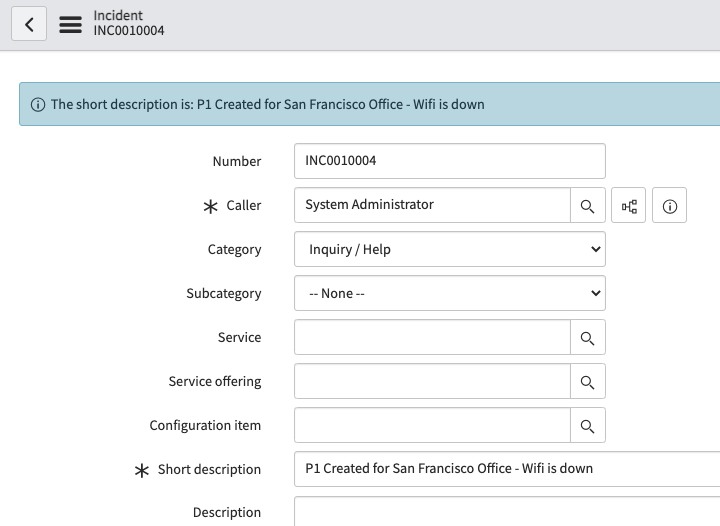
If you wrote the script properly, you should get the following info message on top of the form.
If you’re a new ServiceNow Admin, checkout how to impersonate a user in ServiceNow.
Let us know below if you have any issues with your UI Action configuration.