The ServiceNow Email Client
The ServiceNow email client contains functionality that I see a lot of companies miss out on.
Many end users spend their entire working day in ServiceNow, and still resort to using the “Additional Comments” to send emails.
It takes about 10 minutes to setup and after a little training, can really improve the usability of ServiceNow.
Something that a lot of people complain about ServiceNow is it’s email functionality, and yes out of box there is a lot left to be desired. But with a little customization, you can really improve how your end users receive emails from your fulfillers.
The ServiceNow Email Client, which is able to be added to any task based application, can add deep customizations to outbound emails, that are not possible with the Additonal Comments alone. With a click of a button on the form, your fulfillers can take complete control of emails. It allows end users to customize who the email goes to, add BCC/CC users, change the subject, manually add attachments and provides a Rich Text Editor to them. This is something that every ServiceNow customer should turn on, especially in their applications that heavily connected to emails – like the incident application.
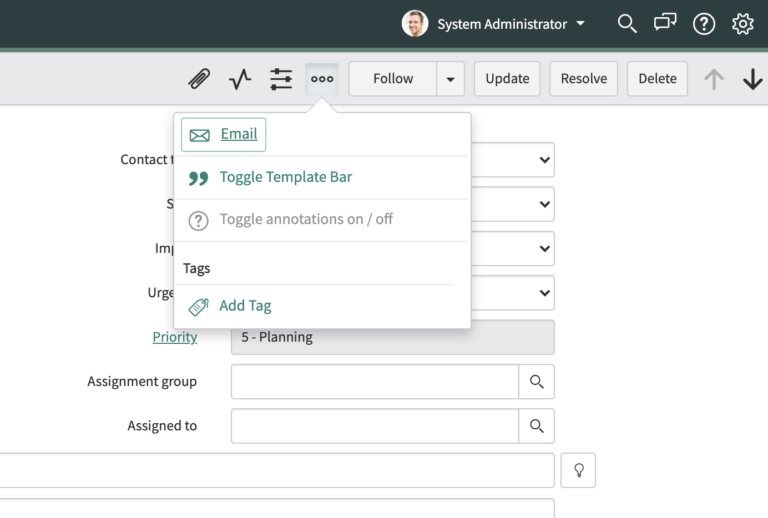
If you want to open the email client on any form, just open the record and click the options menu (
A few things that you must consider before adding or updating this functionality in your instance.
To use the email client, you first need to make sure that the Email Client plugin (com.glide.email_client) has been activated. None of the information here will be actionable if the plugin is not yet activated in your instance.
Email client role: email_composer
Make sure that users have the “email_composer” that need to access the email client.
To set up the email client, there is no scripting required. You just need to update the attributes of a dictionary entry and ensure that 1 plugin is activated.
That’s about it. Let’s dive into the benefits of the email client and how to add it to your most commonly used forms.
Both your end users and fulfillers will love this new functionality coming from ServiceNow, as it massively increases communication between those teams in ServiceNow and the rest of the company.
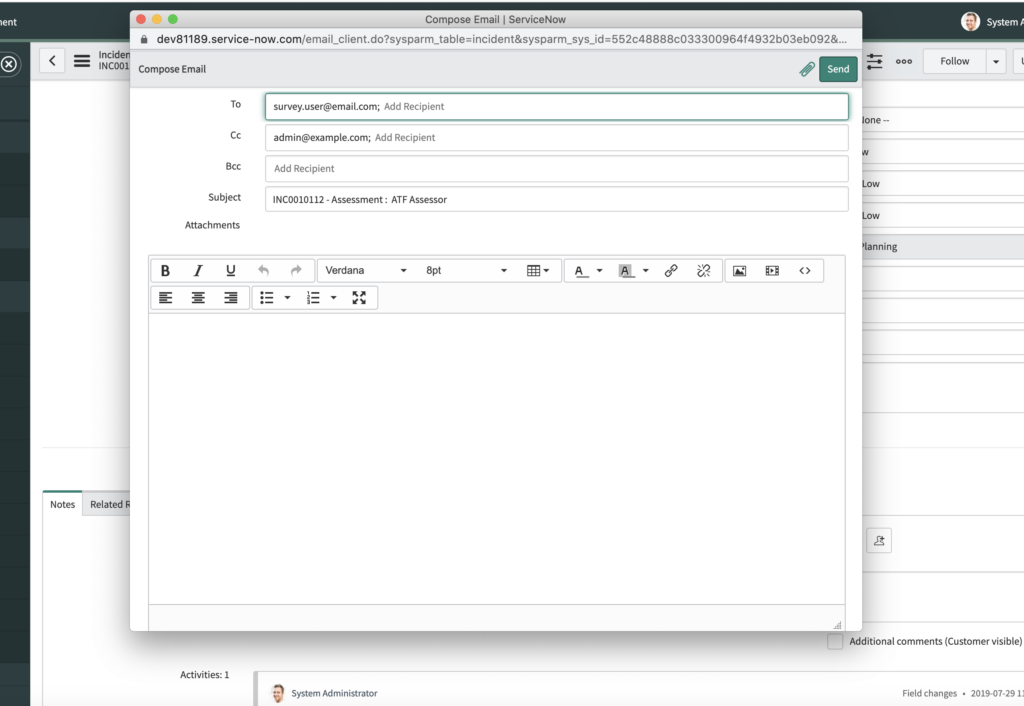
When you add the email client, you’ll see a popout email window that looks just like this.
How To Add The Email Client
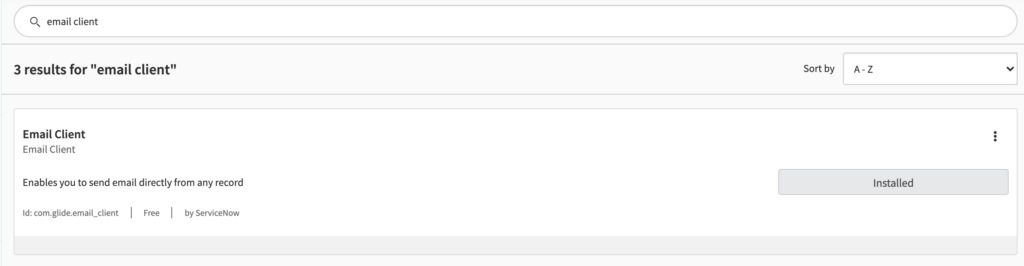
First, confirm that the Email Client plugin is active. Plugin (com.glide.email_client).
It should be activate, out of box – but just make sure that it is before you begin your setup.
It should look like this below when you search for “Email client” in the plugin module.
After you’ve confirmed that the email client plugin is active, we’re going to add it to the incident application. Obviously if you’re adding it to another application, do the same exact steps, but for that table.
Perform this action in an update set in your development instance, and move it through Test/UAT if you have one and then up to production.
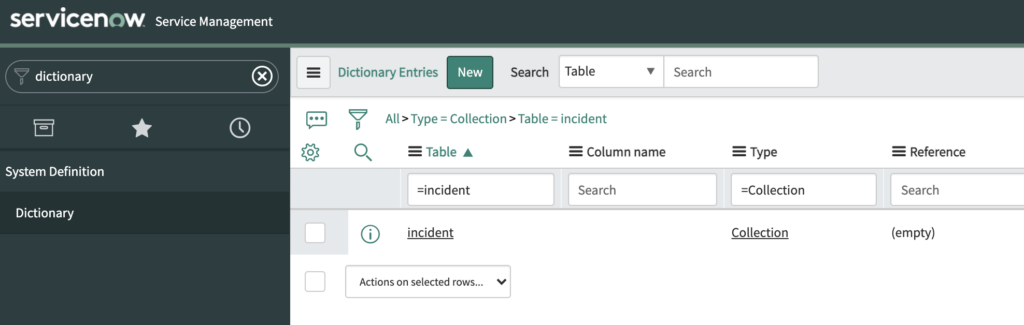
To add the Email Client, you will navigate to the dictionary level of the incident table.
You’re going to want to find the Incident dictionary record that is of type “Collection”.
That should look like this.
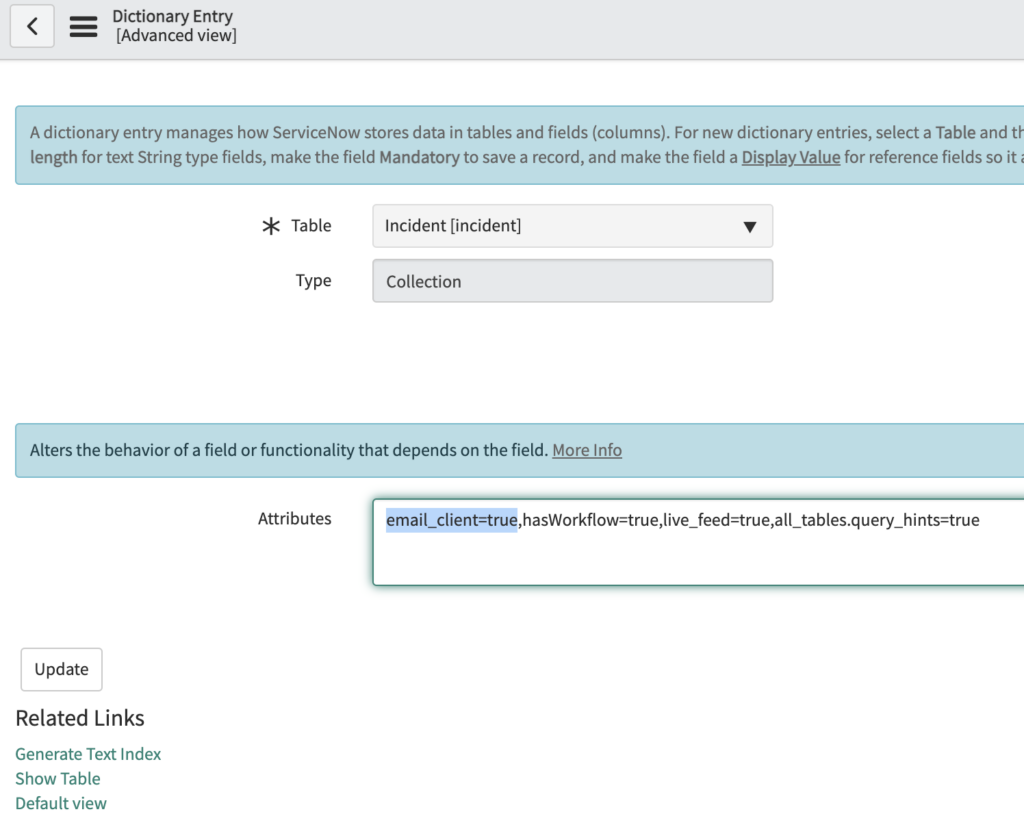
Once you click into this record, you’re going to want to click on “Advanced View” so you can see the Attributes field.
In the attributes field, you’re going to simply add the following value “email_client=true”.
If there are other values already in the attributes field, you can leave them, and just add email_client=true, separated by a comma.
That will look like the below form. After you do this, simply hit Save/Submit, and then navigate back to the form that you’re adding the email client functionality to.
After that’s been completed, you should be all set!
To test this out, navigate to the incident table and hit the “Email” button, after you click the options menu () on the top of the form.

Why Add The Email Client?
Activate the email client and your end users will thank you.
So most fulfillers, like ITIL users for example, will interact with the caller of an incident by adding an additional comment to an incident.
This works for simple communication, back and forth.
But what if they need to add an attachment, or what if it’s super important to be able to bold and italicize certain text in an email.
The Additional Comments field alone will not cut it for this level of customization.
As ServiceNow Admins, it’s part of our job to enable our end users. There are going to be features in the platform that the rest of our company isn’t aware of. So we need to make sure that we’re doing the research to enable them to use the platform in every way that we can.
Once you implement this functionality, you’re going to want to share the newly implemented feature with your team(s).
You can either do this in a quick email to your end users, or you can host a few different sessions or office hours to show them. This is completely up to you and how your company communicates. Just make sure that once you build out new features, that you show and coach your end users through them. This will ensure that your hard work doesn’t go unused and unnoticed.
There are a ton of small and simple fixes that if implemented properly, will massively increase and improve the usability of the system.
Very well documented and informative, solved my problem. Thanks!